QuickBooks Online sync setup guide
This guide will walk through setting up the sync with QuickBooks Online.
Table of Contents
- Sync Overview
- Pre setup requirements
- Connect the Sync
- Sync Preferences
- Accounting Preferences
- Things to know
Sync Overview
The following image shows what objects sync and in which direction.

Pre setup requirements
To complete the Sync Setup steps listed below, please note the following requirements:
- QuickBooks Online: To connect the sync, a Primary Administrator or Company Administrator is required
- As of March 1, 2024 you will need to be sure the Intuit user email being used to connect the sync has been verified in QuickBooks Online first. If the email is not verified, you will receive an error when trying to connect.
- Bill Manager: A user with the Administrator or Accountant role is required.
Connect the Sync
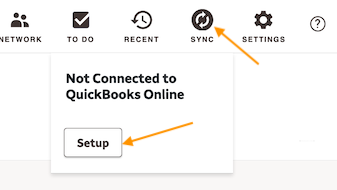
- Select the sync icon and select Setup QuickBooks Online
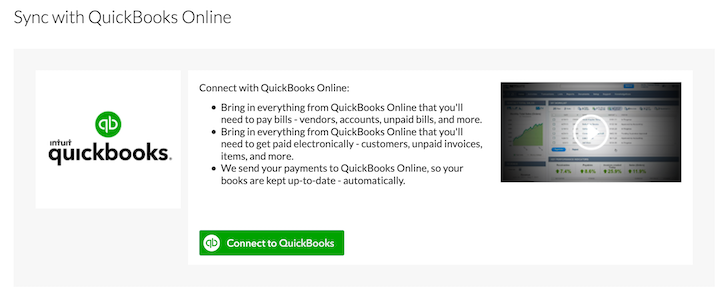
- Select Connect to QuickBooks
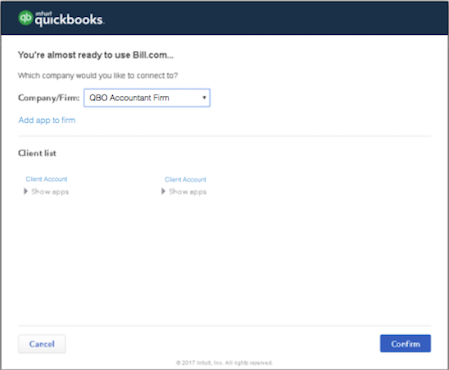
- Enter QuickBooks Online login credentials and select Sign In
- If you're already logged into QuickBooks Online on another browser tab, we'll detect it

- If you're already logged into QuickBooks Online on another browser tab, we'll detect it
- Select the company in QuickBooks Online, if more than one, to sync
- Select Connect
Note: For accountants adding this for your own firm, select add app to firm
- Select simple sync preferences
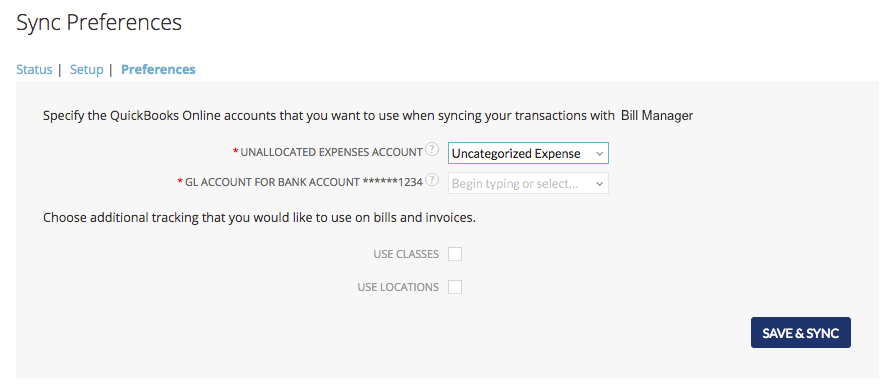
- Select Save & Sync


The Sync is now connected.
Accounting Preferences
The following settings will be set based on settings within QuickBooks Online:
- Show Account Numbers
- Use Locations
- Use Classes
- Use Customer/Jobs in Payables
- Use Items in Payables
To set additional or update preferences:
- Select Settings
- Select Preferences under Accounting
- Select Edit
- Turn on any other settings that will need to be available in Bill Manager
- Select Save
- Select the sync icon and Sync Now to run another sync
The sync setup with QuickBooks Online is now complete.
Inbox View all
Getting Paid (Receivables) View all